
A Quick Guide on How To Install WordPress
WordPress is one of the most used Content Management System (CMS) in the world. This is due to its flexibility and how easy it is to set it up and have your website running in just a few minutes. Now let us go through the steps on how to install WordPress to your domain.
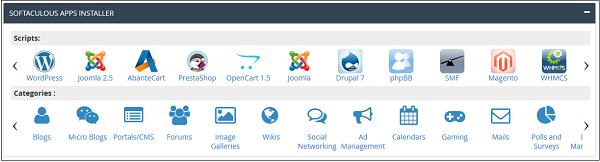
This guide will show you how to install WordPress right after you have set up your Maranyane hosting and Domain. WordPress is installed with the aid of Softaculous, which is a very popular Auto installer that helps thousands of users to install applications very quickly and super easily.
Let’s Get Started:
Now that you have your Maranyane hosting account and domain active, it is time to take advantage of the platform’s famous five-minute installation through Softaculous which can be found in the cPanel in the client area of your Maranyane account, and let us go through how to install WordPress to your domain.
WordPress Automatic Installation:
At Maranyane we offer one-click installation through the cPanel and Softaculous automatic app installer. This allows you to install WordPress without having to get your hands dirty or for you to be tech-savvy. Now to use Softaculous, login into your Maranyane account at the Client Area. Then click the active service or domain you want to install WordPress onto. From there select Login to cPanel then locate Softaculous Apps Installer and select WordPress to launch an auto-installer for WordPress. Now follow these instructions to install WordPress using Softaculous:

- Click install after WordPress auto installer has been launched.
- On the next page you need to fill in your details for your WordPress installation
- Choose the domain – If you have more 1 one domain choose the domain you want to install WordPress to.Leave the directory option as it is.
- Select WordPress version you are familiar with otherwise choose the latest version
- Fill in your Site Settings but these can be changed later on if there is a need.
- Fill in your Admin Account details.
- For plugins it is recommended that you check Limit Login Attempts as this will hep protect your website against brute force attacks.
- Under Advanced options Change the database name or leave it untouched.
- The Table Prefix wp_ should be changed to something unique such wpwebsitename_.
- Now for theme you can leave as default and later on take a look at our theme customization guide to see how to setup your own unique theme or select one of the given theme templates and choose one that suits your website.
- Fill in Email for installation details (very important) then select install.
Congratulations you have now taken one of the major steps to have your website fully running.
What Now After Installation?
Now that you have installed WordPress what is next?
This means that now it’s time to check out ways to manage and grow your new WordPress website. With WordPress, you have great flexibility and freedom to customize your website. It is now time to start learning WordPress and elevating your website with the plethora of availed themes and plugins such as Elementor (coming soon) and many other features to help you to build your perfect website customized just for your needs. Before you know it you have now single-handedly built the most amazing website without learning even a single line of coding or programming